
Canning Homemade Grape Juice (Granny’s Easy Way)
There’s something almost magical about opening a jar of home-canned grape juice and being met with that unmistakable aroma of late-summer sweetness. Canning grape juice is one of the easiest, most rewarding ways to preserve the flavor of freshly picked grapes, and it’s a tradition many of our grandmas perfected long before store-bought juice was ever a thing. Canning homemade grape juice (granny’s easy way) will guide you every step of the way.
This simple method lets you bottle pure, homemade grape juice without additives, food dyes, artificial sweetener, or complicated steps—just real fruit and a cozy bit of kitchen time. If you’re new to canning, this beginner-friendly guide will walk you through every step so you can fill your pantry with rich, vibrant grape juice your family will crave all year long. Let’s get started!
What makes this grape juice recipe the best?
There are a variety of ways to make and can homemade grape juice, but this method is a tried and true old fashioned recipe. This is the way my grandma always did it, and the only way I do it as well. It really has stood the test of time, and with a little bit of sugar truly has the best flavor.
In addition, it’s super simple. I’m all about a quick and easy recipe that can be done in just a few simple steps. No crazy equipment, no pressure canner needed, and minimal dirty dishes!

Which grape varieties are best?
The best variety of grapes for canning grape juice can depend on personal preference. Concord grapes are the most popular grape variety, due to their flavor and color. However, we have Saint Theresa, Somerset, and Canadice and absolutely love them. It is important to find a grape variety that will thrive in your specific environment or garden.
Grapes need a sturdy support system like a trellis or fence, so we grow some of ours along our garden fence. In the midwest a garden fence is absolutely necessary to keep the pests from eating all of our goodies.
Homegrown grapes take a lot of work, but truly produce the best fresh grapes. And our favorite – our own homemade grape juice!
When to Pick the Grapes
Late summer and early fall is when grapes should be picked. Taste test the ripe grapes for sweetness, and be sure they don’t get overripe.
More Beginner Canning Recipes
Be sure to check out other beginner canning recipes such as my homemade pizza sauce, homemade spaghetti sauce, and simple applesauce.
Ingredients

- Grapes
- Sugar
- Water
See recipe card for quantities.
Instructions
Step 1: Sterilizing the Mason Jars and Lids
There are multiple ways to do this:
- Dishwasher Method – Some dishwashers have a sanitize function on the dishwasher which works well for preparing the mason jars. The downfall, however, is this can be a time consuming method.
- Oven Method – Wash the jars with soap, rinse, but do not dry. Place upside down on a baking sheet and put in the oven for 20 minutes at 275 degrees Fahrenheit (130 degrees Celsius). Carefully remove the hot jars for canning.
- Boiling Method – Wash the jars with soap and rinse. Place jars in a large pot of boiling water (like the water bath canner) and let them sanitize for 20 minutes. Remove jars and let air dry before use.
For the new lids – place in a small sauce pan of hot water until it is time to add them to the jars.
Step 2: Preparing the Grapes
First, wash the grapes. Place grapes in a large pot and let them soak for about 5 minutes. Then remove the grapes from the stems – keep only the ripe good grapes and discard any with bug blemishes, any that are mushy, or any that have shriveled.
Next, fill a large pot with water and bring to a boil.

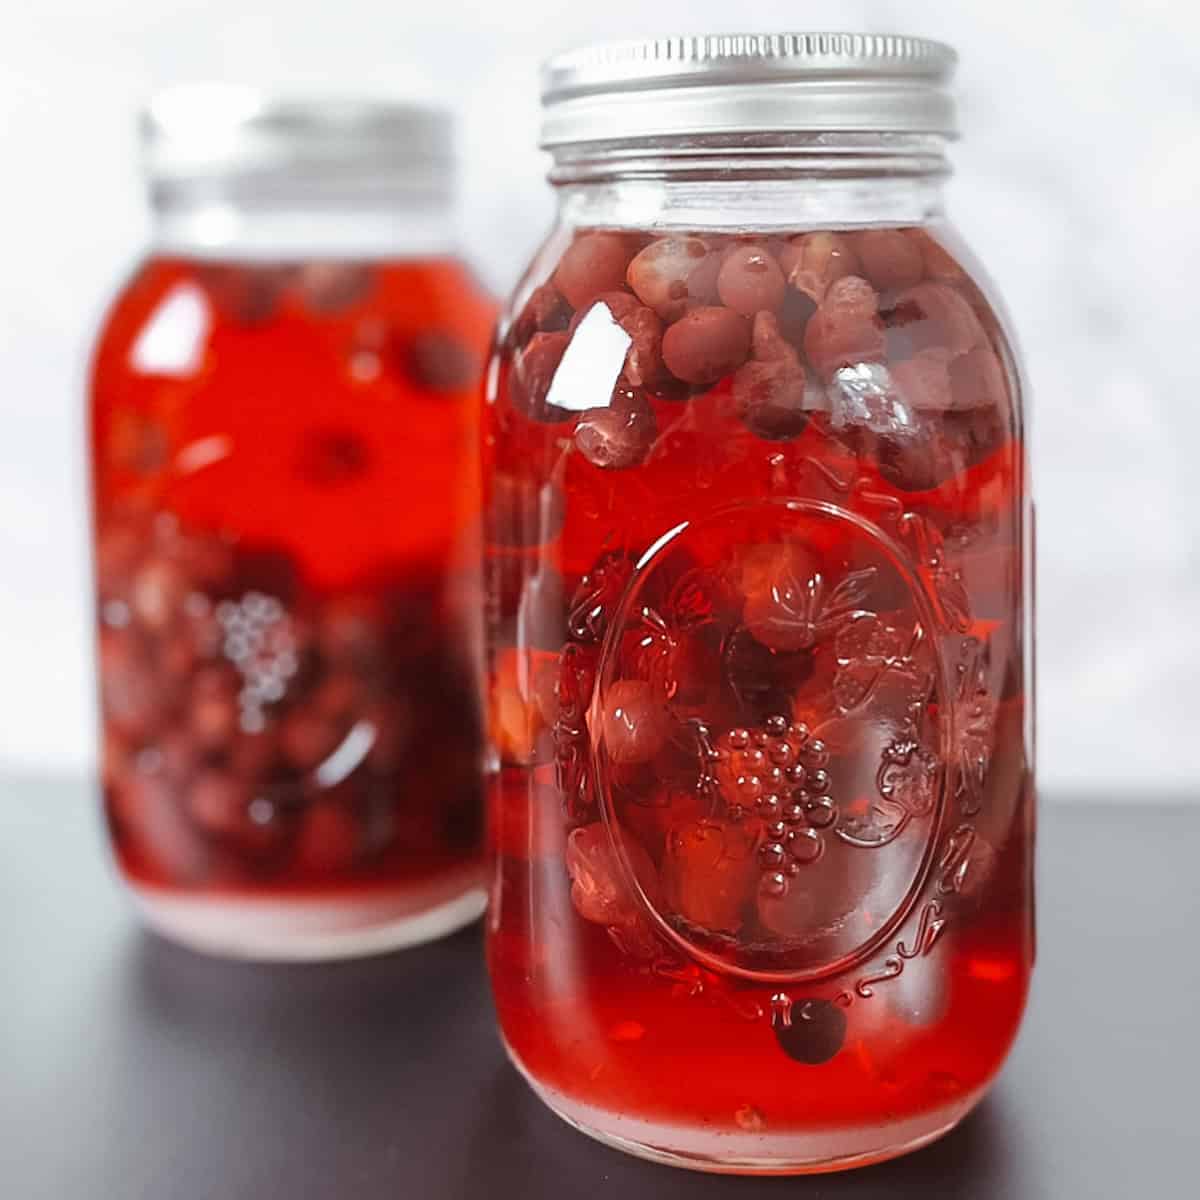
Measure out one cup of clean whole grapes and add them to each sterilized quart jar. Using a funnel makes for less mess. Next, add the 1/2 cup of sugar to each quart jar.

Finally, add boiling water to each jar leaving about an inch of headspace.

Wipe jar rims with a clean damp cloth or paper towel. Using the magnet lid lifter tool, grab the jar lid from the small sauce pan, and carefully place it on the tops of the jars. Screw the rings onto the lids to ensure the lids stay in place.
Step 3: Water Bath Canning the Grapes
Add hot water to a little over ½ of the water bath canner and bring to a full rolling boil.

Place the jars on the inner wire rack of the water bath canner and lower jars into the boiling water. Add the lid to the canner. Process grapes for 20 minutes (quarts) in boiling water. **See notes on elevation from the National Center for Home Food Preservation.
After the processing time is up, turn off the heat and carefully remove the hot water bath canner lid. Grab the metal insert by the handles (with oven mitts) and raise the jars up, carefully hooking the handles onto the edge of the water bath canner. Let the jars sit for 5 minutes.
Lay out a hand towel or a doubled up flour sack towel on a counter surface. This will act as a barrier between the hot jars and cool counter, preventing the counter and keeping the jars from bursting with the drastic temperature change.
Using the jar lifter tool, carefully remove the jars from the wire insert and place them on the towel. Allow jars to sit and cool, undisturbed, for 12-24 hours.

Test jars for airtight seals. The metal lids will not “pop” when pushed down on and will not pop off when pulled up on.
Important Notes
The sugar will not be dissolved at this point, the sugar will remain visible in the bottom of the jar. Don’t be alarmed. The canned grapes need to rest about 6 weeks before enjoying, which is the hardest part of the process – waiting.
After the 6 week wait, the sugar will be dissolved.
When the juice is ready, the grapes can be discarded, or mashed to maximize the juice flavor and/ or enjoyed with the juice.
**Note on elevation and times from the National Center for Home Food
- 0-1000 ft : 20 minutes
- 1001-3000 ft : 25 minutes
- 3001-6000 ft : 30 minutes
- above 6000 ft :35 minutes

Equipment
- Canning Equipment – Large water bath canner
- Canning Tools – a great kit makes life easier! (jar lifter, funnel, magnetic lid lifter)
- Large Mixing Bowl
- Large Stock Pot (non-reactive)
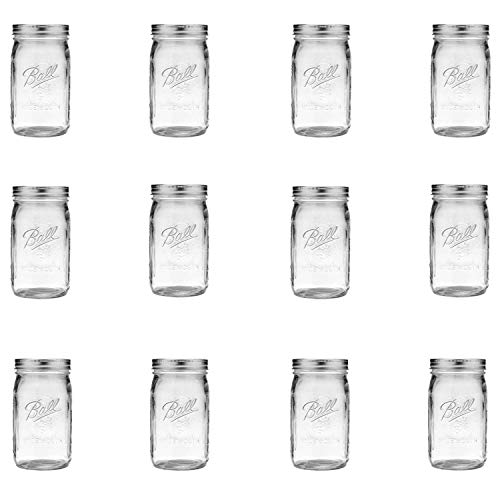
- Canning Jars – Quart Jars (new mason jar and lid or used jars with new lid – seal must be intact.)
Storage
If a jar does not completely seal, store it in the refrigerator and consume within 1 week or can it a second time with a fresh lid. Jars of grape juice that seal will be shelf stable for up to 1 year.
Canned goods should be stored at room temperature in a cool dark place. All of our canned goods, including quarts of juice, are kept in the basement on sturdy shelves.
In addition, we prefer to store jars of our canned goods without the outer rings or screw bands on the jars. This is recommended because it prevents rust, mold, and vermin. Plus, the rings can trap moisture or food residue which can make bands difficult to remove.

Variations
When I first made the grape juice, 1/2 cup of sugar per quart seemed like a lot. I have made the juice with a little less sugar, and think the flavor is just as good. It really comes down to personal preference and how sweet the grapes themselves are.
Alternative Methods
This guide covers step by step the water bath method to can the grape juice. Other options for preserving grapes would be to freeze them or via pressure canning.
FAQ
No, fresh picked grapes can be stored in a breathable container in the refrigerator. Do not wash them first.
Yes – and great way to enjoy your home grown grapes!
No – this method doesn’t require the grapes to be cooked prior to canning.
No, grapes are acidic enough and adding lemon juice isn’t necessary.
We usually pick what is ready, then use the amount of grapes necessary to do a couple of full canner loads. Any extras we eat or store in the refrigerator until we are ready to use them with another batch or for another recipe.
Save Pin for Later!


Canning Homemade Grape Juice (Granny’s Easy Way)
Equipment
- Large Mixing Bowl
- Large Stock Pot (non-reactive)
- Canning Jars – Quart Jars (new mason jar and lid or used jars with new lid – seal must be intact.)
Ingredients
- 1 cup Grapes
- 1/2 cup Sugar
- Water
Instructions
Step 1: Sterilizing the Mason Jars and Lids
- There are multiple ways to do this:1. Dishwasher Method – Some dishwashers have a sanitize function on the dishwasher which works well for preparing the mason jars. The downfall, however, is this can be a time consuming method.2. Oven Method – Wash the jars with soap, rinse, but do not dry. Place upside down on a baking sheet and put in the oven for 20 minutes at 275 degrees Fahrenheit (130 degrees Celsius). Carefully remove the hot jars for canning.3. Boiling Method – Wash the jars with soap and rinse. Place jars in a large pot of boiling water (like the water bath canner) and let them sanitize for 20 minutes. Remove jars and let air dry before use.
- For the new lids – place in a small sauce pan of hot water until it is time to add them to the jars.
Step 2: Preparing the Grapes
- First, wash the grapes. Place grapes in a large pot and let them soak for about 5 minutes. Then remove the grapes from the stems – keep only the ripe good grapes and discard any with bug blemishes, any that are mushy, or any that have shriveled.
- Next, fill a large pot with water and bring to a boil.
- Measure out one cup of clean whole grapes and add them to each sterilized quart jar. Using a funnel makes for less mess. Next, add the 1/2 cup of sugar to each quart jar.
- Finally, add boiling water to each jar leaving about an inch of headspace.
- Wipe jar rims with a clean damp cloth or paper towel. Using the magnet lid lifter tool, grab the jar lid from the small sauce pan, and carefully place it on the tops of the jars. Screw the rings onto the lids to ensure the lids stay in place.
Step 3: Water Bath Canning the Grapes
- Add hot water to a little over ½ of the water bath canner and bring to a full rolling boil.
- Place the jars on the inner wire rack of the water bath canner and lower jars into the boiling water. Add the lid to the canner. Process grapes for 20 minutes (quarts) in boiling water. **See notes on elevation from the National Center for Home Food Preservation.
- After the processing time is up, turn off the heat and carefully remove the hot water bath canner lid. Grab the metal insert by the handles (with oven mitts) and raise the jars up, carefully hooking the handles onto the edge of the water bath canner. Let the jars sit for 5 minutes.
- Lay out a hand towel or a doubled up flour sack towel on a counter surface. This will act as a barrier between the hot jars and cool counter, preventing the counter and keeping the jars from bursting with the drastic temperature change.
- Using the jar lifter tool, carefully remove the jars from the wire insert and place them on the towel. Allow jars to sit and cool, undisturbed, for 12-24 hours.
- Test jars for airtight seals. The metal lids will not “pop” when pushed down on and will not pop off when pulled up on.
Notes
- 0-1000 ft : 20 minutes
- 1001-3000 ft : 25 minutes
- 3001-6000 ft : 30 minutes
- above 6000 ft :35 minutes
Nutrition


So delicious, thank you for the easy recipe!
Who knew making grape juice was so simple?? Love it! ♥️
Oh, this is a great recipe! I love that you don’t have to use a juicer for this, so simple!