
Quick and Easy Homemade Playdough – Simple DIY Recipe
There’s something magical about quick and easy homemade play dough — the kind that comes together in minutes, smells amazing, and keeps little hands busy for hours. Whether you’re a parent, teacher, or caregiver, having a reliable DIY playdough recipe in your back pocket is a total lifesaver. In this step-by-step guide, Quick and Easy Homemade Playdough – Simple DIY Recipe, I’ll walk you through exactly how to create the perfect batch.

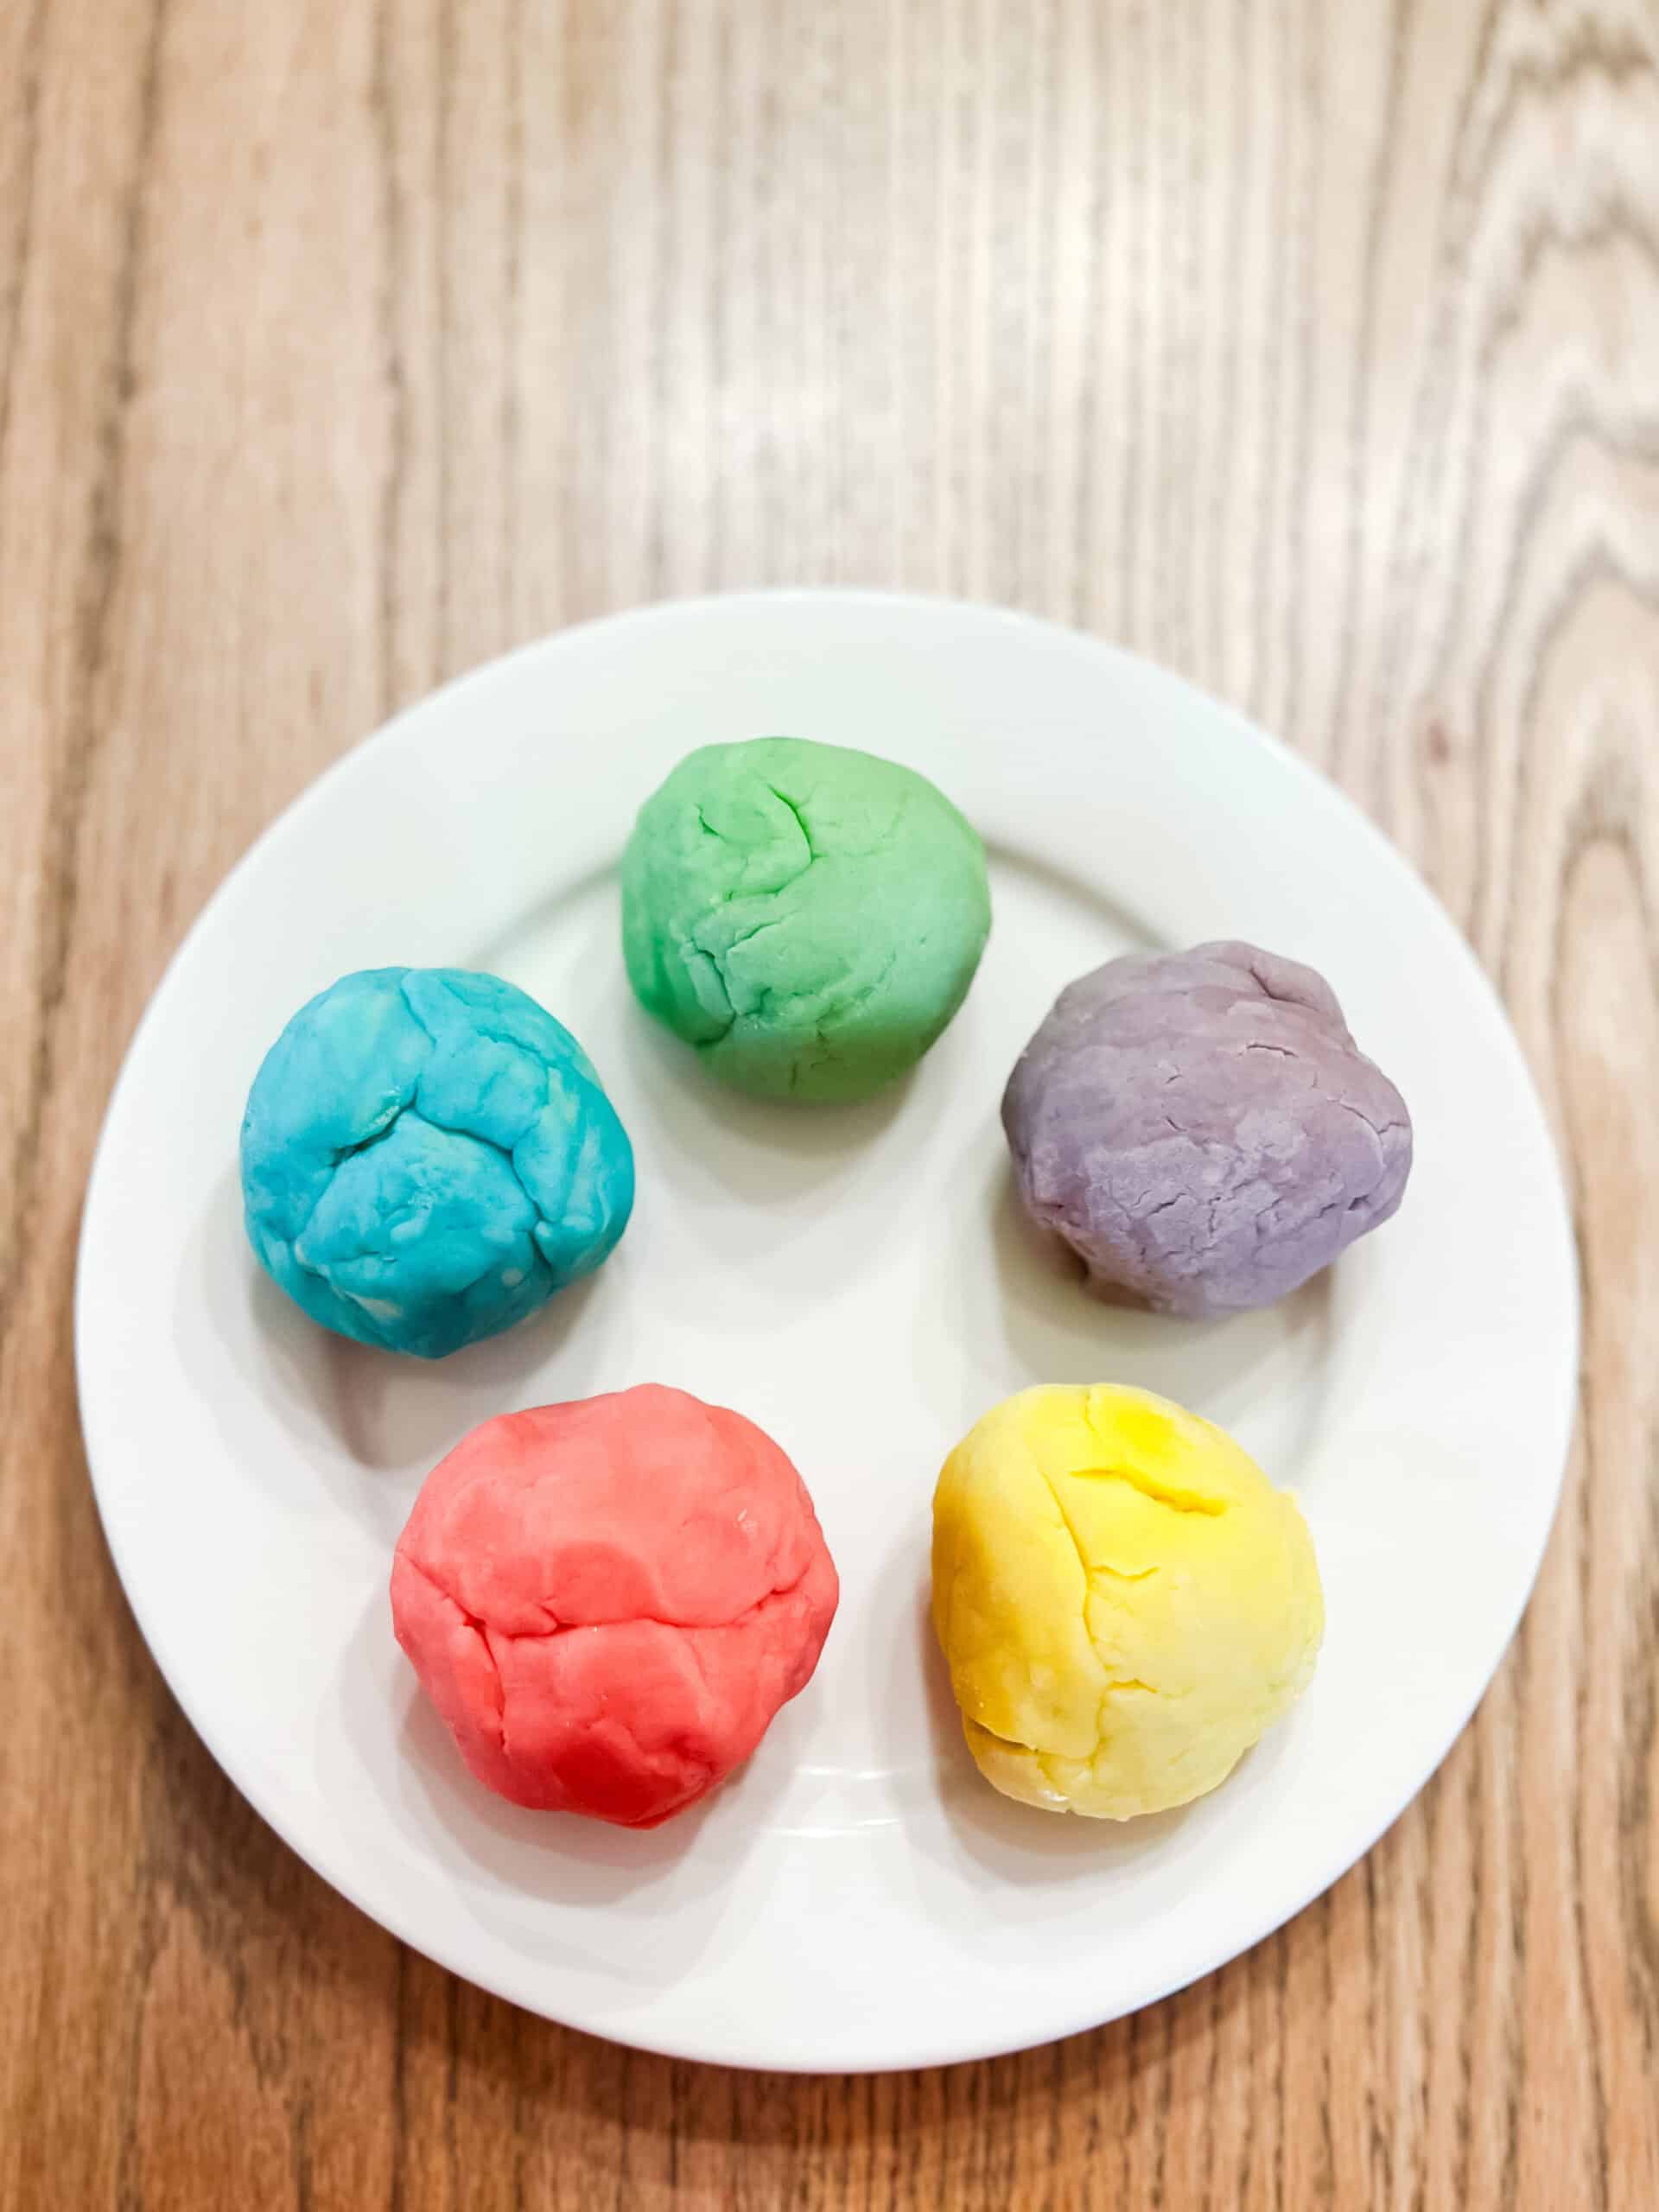
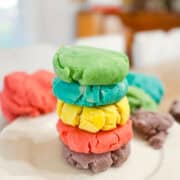
This soft, squishy, vibrant dough costs pennies to make and skips all the questionable ingredients found in store-bought playdough versions. Homemade play dough using simple pantry staples is the perfect rainy day activity the kids can get behind. Get ready for endless creativity, sensory play, and happy kiddos with the easiest homemade play dough recipe you’ll ever make.
For those wondering, yes this is the best homemade playdough recipe – we have tried many different recipes! The process is so incredibly simple and easy to follow that my young children can do it. Furthermore, you just can’t beat a natural play dough recipe that only leaves one dirty pot – not to mention a perfect texture (not too sticky, not at all crumbly.)
Why Homemade Playdough?
- Non-Toxic – You know exactly what ingredients are going into it, making it a safer, non-toxic option for little hands. There are no artificial dyes, fragrances, or preservatives unless you choose to add them.
- Quick & Easy – It’s quick and easy to make, often taking less than 10 minutes from start to finish. (and it’s fun!)
- Affordable – It’s budget-friendly and uses simple pantry staples – common ingredients you likely already have at home. It saves an extra trip to the store and you get way more bang for your buck!
- Consistency – The texture is softer, smoother, and longer-lasting than most store-bought brands. Say goodbye to crumbly playdoh that only lasts a day!
- Customizable – You can customize colors, scents, and textures to fit your child’s preferences or sensory needs. (this is the one time I don’t dread glitter ha!) *hint – this could make the perfect custom birthday or Christmas gift
- Fun – Making it becomes an activity itself, giving kids a hands-on experience in measuring, mixing, and creativity.

Ingredients
- 3 cups All Purpose Flour
- 3 cups Water
- 6 teaspoons Cream of Tartar
- 1 cup Salt
- 3 tablespoons Olive Oil
- Food Coloring (gel works best)
- 10 drops Essential Oils (optional for scent)
Equipment
- Medium Saucepan (nonstick)
- Spatula
- Storage Container
Instructions
Add all dry ingredients to a medium saucepan and mix well. Next add wet ingredients.

Cook over medium/ low heat, stirring continuously. It will start to bubble.

If you’re only making one color, add the color and essential oil now.
The mixture should thicken and start to form a large dough ball, and may collect in a large ball on the spatula. The dough should be heated until it is no longer super sticky, but not so long that it dries out.

If multiple colors will be used, cook the playdough and then carefully divide the cooked playdough into separate portions (allow it to cool before handling.) Add 5 drops or more of gel food coloring to each portion of the dough (and 5 drops of essential oil or other mix ins.) Mix well.
Note – adding the playdough portion, food coloring, and mix ins to a plastic baggie and squishing it around to evenly distribute color is a great way to avoid the color staining hands.
Set aside on a plate or piece of parchment paper to cool in the refrigerator for an hour.
Once cooled completely, store in a ziplock bag. It no longer needs to be refrigerated, but does need to be kept in a sealed bag or air-tight container to keep from drying out.
Pro Tip – store old cookie cutters with the kids playdoh for hours of entertainment!

Storage
Store playdough in a zip lock bag or in an airtight container to keep the dough from drying out.
Substitutions
Any cooking oil will work – vegetable oil, coconut oil, and avocado oil will work just as well in place of olive oil.
FAQ
If it is super sticky, and the correct amount of ingredients were used, it is likely the homemade play doh hasn’t been cooked long enough. Be sure the appropriate amount of salt has been used – this is most often the culprit, the recipe calls for lots of salt.
Cream of tartar helps to naturally preserve the playdough, extending the shelf life, and it helps prevent a crumbly playdough (who likes to deal with crumbly playdough, not me!)
It should last for several months if cooled and stored properly.
Yes, this is a cook play dough recipe – without heating it you will end up with a sticky mess.
No, you do not need to refrigerate it. It will keep for a couple of moths without refrigeration, However, if you have the fridge space, refrigeration can extend the shelf life of the playdough another month or two.
Save pin for later!

Quick and Easy Homemade Playdough – Simple DIY Recipe
Equipment
- Medium Saucepan (nonstick)
- Spatula
- Storage Container
Materials
- 3 cups All Purpose Flour
- 3 cups Water
- 6 teaspoons Cream of Tartar
- 1 cup Salt
- 3 tablespoons Olive Oil
- 5 drops Food Coloring gel works best
- 10 drops Essential Oils optional for scent
Instructions
- Add all dry ingredients to a medium saucepan and mix well. Next add wet ingredients.
- Cook over medium/ low heat, stirring continuously. It will start to bubble.
- If you’re only making one color, add the color and essential oil now.
- The mixture should thicken and start to form a large dough ball, and may collect in a large ball on the spatula. The dough should be heated until it is no longer super sticky, but not so long that it dries out.
- If multiple colors will be used, cook the playdough and then carefully divide the cooked playdough into separate portions (allow it to cool before handling.) Add 5 drops or more of gel food coloring to each portion of the dough (and 5 drops of essential oil or other mix ins.) Mix well.
- Note – adding the playdough portion, food coloring, and mix ins to a plastic baggie and squishing it around to evenly distribute color is a great way to avoid the color staining hands.
- Set aside on a plate or piece of parchment paper to cool in the refrigerator for an hour.
- Once cooled completely, store in a ziplock bag. It no longer needs to be refrigerated, but does need to be kept in a sealed bag or air-tight container to keep from drying out.
Notes


Related
Looking for other recipes like this? Try these:

My little one is almost ready for play dough. I can’t wait to make her some this summer. Thanks for the recipe!
Oh these are so fun…. I’m going to make some!
I’ve always wanted to make play dough for my boys! Easy and great recipe!
I definitely want to try making homemade playdough when my kid is a little bit older and won’t eat it!
Love your play dough colors, can’t wait so make some with my nieces and nephews.
We haven’t had playdough for a while, and this looks like a great recipe to make!
this is so fun! the kids can stay busy helping create the playdough too. Great shares.
This looks so simple and easy to make! What an awesome nontoxic swap for kiddos!
LOVE this! Can’t wait to try it with my daughter. I also love how it’s made with simple ingredients that aren’t toxic. Fantastic!
Great play doh recipe! My kiddos love making their own colors when we make it too. <3
we go through so much play doh at our house. this is so easy and is going to save me so many trips to the store!
Love your blog name and what a great play dough recipe!
Very thorough instructions! In my early years as a mama, homemade play dough was such a favorite. Many times it helped me get supper on the table while my toddlers were safely in their high chairs twisting, smashing, rolling, and making while I got things done.
Love this playdough recipe!!! Lasts a long time and so much better than store bought. Kids love it and I love that is isn’t as crumbly so way less mess!